Pictured: Four keys on a silver key ring. Two of the keys have brightly painted tops, one white and the other pink. The two remaining keys are unpainted.
How many keys do you carry with you? I have four keys on my key ring. Sometimes it is hard to tell which key I need in the moment.
My four keys can be distinguished by size and shape. There is one small key, two medium sized keys, and one large key. Unlike the others, the large key has a square shape to it. It is the two medium sized keys that often pose a problem. Left in their original state, It is difficult to distinguish them due to their similar size and shape.
There are a number of ways to customize keys so that they can be distinguished by touch and by sight. Your vision can impose more specific needs. So here are some ideas.
Pictured: A selection of customizing materials. There are bump dots of various sizes, colors, and textures, two jars of nail polish (one white and one pink), and a braille label maker.
Place a bump dot at the top of the key used most often. A second key might have two bump dots, and a third might have a bump dot on the front and back of the top of a key. Bump dots are available in different sizes, shapes, colors, and textures,so finding what works bests for you offers many choices.
Add braille by using a braille label maker. A brailled F for front door and a B for back door or M for mail might prove helpful. These are just suggestions to get you started.
Paint the tops of your keys with nail polish. Nail polish is very durable. There are lots of colors to choose from, even glow-in-the-dark types. I painted my 2 medium sized keys with nail polish to differentiate them – one white, one a dark pink.
Customizing the look and feel of your keys could be your key to success.
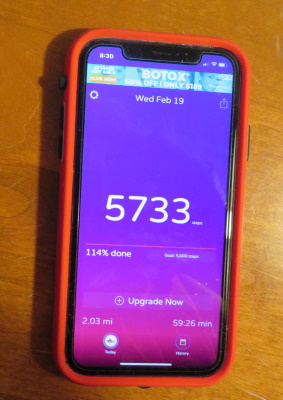
But first a confession. I actually already have a step counter, and I use it all the time. My iPhone has a step counter, a good one too. The screen is large, bright, and easy to read. Using it, however, means keeping the phone with me at all times. I even bought a holster that clips onto my jeans pocket to host my iPhone, keeping it with me every step of the day.
There’s a problem. The iPhone is heavy. Add the weight of the holster and it really is a drag to carry around all day every day. After months of doing so, decided I need a tiny gizmo to count my steps. My phone can stay in my purse or at my desk, or wherever and just be my phone.
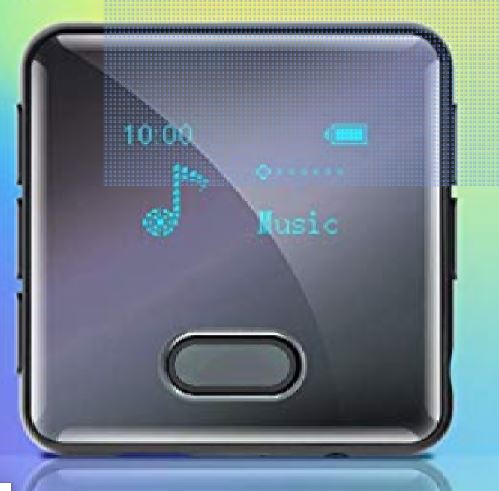
Pictured: Tiny MP3 player by Wiwoo about 1.5 inches square that includes a pedometer.
I studied the market. I need a simple step counter that is small, lightweight, and can live unobtrusively in my pocket. I finally selected a tiny MP3 player that includes a pedometer, made by a company that calls itself Wiwoo. The screen is clear, and backlit, and the whole thing is less than two inches square. I soon learned, however, that the screen is too tiny to read and getting into the pedometer part of the gizmo is a major hassle. So I returned it.
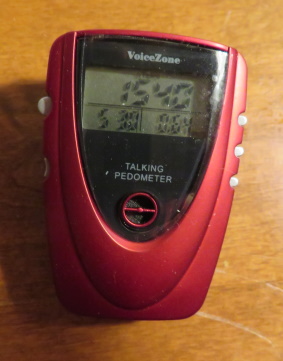
Pictured: Talking pedometer by VoiceZone, about 2 inches tall.
Next I tried a talking pedometer by VoiceZone. With that, I don’t have to worry about screen size. After all, the gizmo will read the step count aloud to me. Since that is all this gizmo does, it appeared to be easy to operate. It disappointed me big time! First, it was difficult to hear and understand, especially outdoors with street noise, or even indoors with the TV on or a pot boiling on the stove in the next room! The screen (no backlighting) is impossible for me to see. Finally, it did some crazy step-counting! I could easily reach 5,000 steps in about an hour with this thing. So I returned it. This company, by the way, doesn’t accept returns, they were quick to tell me. When I responded that I understood and would simply write an honest review on amazon, they immediately granted me “an exception” of a full refund.
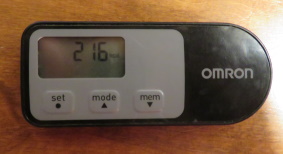
Pictured: A pedometer by Omron, about 2.75 inches long, with tiny screen and no speech.
Finally, I ordered a small pedometer from Omron, a healthcare company. They offered free shipping and promised accuracy. Remarkably it turned out to be the least expensive of the three gizmos I tried. And I love it. So I have to hold this pedometer close, up to my nose, and then squint to read it. I can do that!
Pictured: A thick fuzzy crocheted dusting mitt is shown swiping dust from window blinds.
Sometimes things look way better than they really are!
Several years ago, I saw a youtuber demonstrate the use of a kind of yarn I had never seen before. It was Bernat Tizzy yarn. (Apparently, this particular yarn had been recalled in 2015. Nevertheless, similar yarns are available.) This is a chunky yarn with lots of little ends hanging off the main strand. The yarn is also variegated – a fuzzy yarn that changes colors too. This funky yarn was designed to create a product with lots of texture and color. It looked like fun. I ordered a skein.
I was excited when the yarn arrived and I began to work with it right away. I had never worked with any fancy yarn before so the whole thing was new to me. I tried to create the foundation chain, ripped it, and tried a few more times. After some time, I managed to complete that foundation chain and went on to try and work a single crochet in each chain stitch. After numerous attempts, I dropped the project. All I had created was frustration.
The other day I watched another youtube video, this one using a similar crazy yarn. The youtuber had made a dusting mitt. She raved about her project. The crazy yarn made a great duster, she said. It looked cute.
So I pulled out my skein of yarn that has been tucked away for years and decided to try again. I simplified the youtuber’s pattern though, and made a dusting mitt in the round – just one piece – no sewing, no fuss. And after an hour or so, it was done.
Pictured: A single strand of funky yarn in varying shades of pink. There are small pieces of yarn coming off of the main strand for the purpose of creating a thick fuzzy knit or crochet project.
This yarn is difficult to work with and I would never spend hard-earned money on such a type of yarn as this again. However, today it worked. Because of its thickness, I was able to feel my way even though the stitches were buried beneath the fluff. If there are errors, no one will ever know! And it is a dusting mitt; if there are errors, who would care!
My dusting mitt turned out great! It picks up dust easily from tabletops to window blinds. It goes in the washer and dryer. Best of all, I got rid of some crazy yarn that, until now, was just taking up space.
Pictured: DIY Shower Cleaner, bottle of Dawn dish detergent, and DIY All Purpose Cleaner.
Original blue Dawn has so many uses. It has been tried and tested and proven to be safe and effective. For people who are blind or visually impaired, it is best to minimize the toxic cleaners we think we need in order to keep our homes clean and manageable. Of course, this is best for everyone, not just the VIP community. Instead of a shelf full of assorted bottles and jars that can be harmful and confusing, try paring down your cleaning supplies with a few very effective nontoxic cleaners.
Remember to label all of your bottles containing homemade cleaning products. Use a bold indelible (permanent) marker and/or a braille label maker.
Be safe and save money!
1. All Purpose Cleaner
Keep a bottle of all purpose cleaner handy. Wipe fingerprints from walls and dirt and spills from tile floors. It is great for removing grease and scum from kitchen cabinet doors and hardware, and cooktops too.
Spray all purpose cleaner in pots and pans after cooking and let stand while you enjoy your dinner. Then wash pots and pans as usual, but with amazing ease.
Ingredients – Fill a spray bottle with 1/3 Dawn, 1/3 distilled vinegar, and 1/3 water. For more difficult jobs, spray and let stand for 10 minutes, then wipe clean. Note: Vinegar does not behave on stone (porous) countertops including marble, granite, etc., so use Dawn without vinegar on such surfaces.
2. Carpet spot cleaner
Apply a few drops of dish detergent to the soiled carpet area. Scrub with brush, even an old toothbrush. Let stand for 5 minutes or so. Rinse with just a little clear water. Blot dry.
3. Shower and bath cleaner
Prepare all purpose cleaner as above. Spray down shower walls, bathtub surfaces, and especially faucets. Let stand for a few minutes. Then rinse and wipe clean. I leave a filled spray bottle in the shower and spray faucets and known problem spots at the beginning of the shower. At shower’s end, I just wipe clean. The shower practically cleans itself.
4. Ice Pack
Fill a good quality zippered sandwich bag ¾ full with Dawn. Remove excess air. Place in freezer. This DIY ice pack will be soft and malleable and will remain cold longer.
5. Clean your eyeglasses
Just place one drop of Dawn on each eyeglass lens, rub with fingertips over both sides of the lenses, and rinse clean. Dry with a microfiber cloth.
And my favorite…
6. Unclog the toilet
Pour about a cup of Dawn dish detergent into the clogged toilet bowl. Let stand for about 15 to 20 minutes. Then flush. Repeat if necessary, but it probably won’t be necessary.
BONUS:
7. Bug spray
Fill a spray bottle with water and add just about 2 teaspoons of Dawn. Shake. Spray directly on targeted insect. Bugs do not die instantly, but still quickly.
When I want to see things, I hold them close, very close. Reading is possible if the letters are big enough and held close enough. But how long can I stay hunched over a book or a chart, or whatever? How long until my wrists and shoulders ache from holding up a heavy book or even a one-page instruction sheet? Not very long! It takes just minutes, sometimes just seconds, before my neck and especially my back start to ache unbearably. So I have found ways to hold things close, and at just the right height and angle.
So here are 9 ways I have found to hold things close.
Pictured: Silver phone stand by Belkin – one position only, but folds compactly for portability.
I bought this Belkin cell phone stand in 2012 and I still use it frequently. I like to keep my phone propped up with speakerphone turned on, especially for group conversations. There are times when I use it to support my iPad for skype chats. It is very small, just 3” x 5”. It folds up compactly and is easy to carry with me. I don’t think this particular one is still available, but you get the idea.
Pictured: An iPad held by a flexible black metal arm that is clamped to a table. The arm can move in any direction side-to-side and up and down.
I use this for applying my makeup, and fixing my hair. I use an old iPad that is no longer supported by Apple and so I can’t download any of the newer software. It has become my grooming station. I use a magnifier app to help with makeup, and the camera to snap selfies that I then enlarge (a lot) to check out the results. With this iPad holder, I can move the arm up, down, this way or that – exactly where I need it with just a light touch.
Pictured: Belkin tablet stand for great support of heavier tablets and more. It can be easily positioned up and down to any angle, including parallel to the table.
The tablet can be moved up and down to almost any angle and the tablet is always held securely. I like to place the iPad parallel to the table. Then I hang just the camera end over the side. I can capture documents by photo or scan and send them to my computer for enlargement and manipulation. This stand is sturdy enough to easily hold my iPad Pro. It also supports my big whiteboard (16″ x 20″) while I write notes and reminders.
Pictured: Bamboo book stand has 4 tilt positions and strong metal arms that can be positioned to hold your book in place with pages held flat.
I love bamboo because it is ecologically friendly. This book stand is super sturdy and holds even large or heavy books open so that the pages are flat. I prop this up to where it works best for me.
Pictured: Bamboo lap desk. The main section of the top can lie flat or be raised to tilt in 4 positions with ledge to keep a book or laptop from slipping. About 1/4 of the table remains flat to hold additional materials. A side drawer pulls out to store small stationary supplies.
More bamboo, and still loving it.
This bamboo laptop desk can be placed over he lap when seated on a chair or couch, or even sitting up in bed. I love the look and feel of this, its versatility, and its small convenient drawer. It can be used as a flat table or angled in four different positions.
Pictured: A lap table with 4 height positions and 4 tilt positions. It has guards to prevent items from slipping off the tabletop. Extra wide surface and super sturdy, yet very lightweight. Here it is on top of another table, where I like it best.
I call this my Tabletop Table because I use this versatile table on top of another table. I use it for close work, like drawing, or projects that will take me some time. With this, I have less bending forward to see what I am doing. I am more comfortable and I can work for longer periods of time. It sure saves my neck and back from aching. It has a large writing surface. This one measures 20″ x 12″ and there is a larger version also available. The legs can be extended in a choice of heights, bringing the material closer and closer to me as needed, and then the table can tilt to four different angles. This has become my favorite accessory.
Pictured: A small silver tablet holder. The base is flat on the table and rolls around the back and up in a fixed position to support the flexible area that actually holds the tablet. This part easily moves to angle the tablet.
My newest addition. This is a small tablet stand that I use to hold my smaller whiteboard which measures 11” x 14”. I keep it next to my computer. It makes jotting down notes or reminders easy-peasy. Plus, it is portable and adjustable and I can easily carry my whiteboard and stand from room to room as needed. This small tablet stand works great for me most of the time, and is one-quarter of the price (under $15) of the larger Belkin tablet stand I talked about above.
8. Recipe Holder
Pictured: A white plastic clothes hanger with 2 binder clips clamped on holding a large print recipe. It is hanging from a kitchen cabinet knob. This recipe is for homemade Play-Doh (for the kids to play with).
We used to call this a “Rube Goldberg” machine. It is a simple DIY, and one of my favorite things. It is a plastic (or wire) clothes hanger, like the ones you get free with purchase from department stores. Just clip your recipe to the hanger and hang in your kitchen work area from a cabinet knob or handle. If you don’t have a hanger with clips attached, how about using a couple of binder clips clamped onto a hanger you already have.
9. Arms
Pictured: The hug! Here the author is hugging a man. Okay, my husband.
When you want to hold a person close, it is your arms that are most appreciated. Hugs, everyone!
You don’t have to be blind or visually impaired to experience panic, but it helps.
For me, there are 4 things that cause me to experience panic.
Pictured: The inside of a crowded New York City subway car. All seats are taken and there is standing room only.
1. Crowds. I do not mind crowds in a mall or at a concert. I do not mind crowds at the beach or in a packed subway car. I do, however, mind crowds greater than 5 or 6 people where I am expected to know at least some of the people.
I cannot see who is there or who is where. When I enter a room, I cannot assess the space and know whom to approach. I know these people. I belong there. But who is here? I have been known to strike up a conversation with a lamp, ask a mannequin for directions to a bathroom, and greet a golden retriever that was impulsively snatching food from a table. So I wait for someone to notice me, to greet me, and if that does not happen, I am overwhelmed with not knowing what to do and where to go.
I have avoided family gatherings most of my life. I did not attend my high school graduation, or my college graduation, I have declined invitations to weddings. My own wedding was limited to just 10 people including me, the groom, and a five-month-old baby; any more would have ruined my special day.
Pictured: A white smoke detector hung on a ceiling just waiting to sound its ear-piercing alarm.
2. Smoke detectors. I do not know why smoke detectors upset me so. We lived in a small apartment in Portland, Oregon, and there were 3 smoke detectors in our small place. Normal cooking set off all three smoke detectors – frequently. They were ear-piecing! I tried so hard to avoid anything that would set them off, but sometimes just the toaster would do it. Cooking makes my heart pound.
We moved three years ago. There is only one smoke detector in our current apartment. The first time I used my oven, the smoke detector went off. I have not used my oven since.
Pictured: A pre-schooler on a scooter. He is protected with helmet and elbow guards. When he is around, I need those protections too, and more!
3. Kids on scooters. Little kids on scooters scare me most. They roll themselves along the sidewalk at a faster pace than they can handle. They cannot steer to avoid objects in their way, including people. The parents or guardians are often far in the distance, sometimes calling to the seemingly deaf wee ones. These kids are essentially untethered and unattended. When they are headed straight at me, I usually do not know until they are near enough that I feel the air movement they generate. They do not comprehend the meaning of a white cane; they do not understand that their path is not automatically cleared for them. I have redirected quite a few of these speeding demons with my hand or body just in the nick of time, or not. I am afraid those little speed demons just might kill me one day!
Pictured: A public restroom with a lineup of sinks opposite a row of stalls.
4. Public Bathrooms. Public bathrooms drive me crazy – even without considering all the germs. First, they have to be found. Just ask. It’s over there, wherever there is! Too many are too dirty and I flat out reject them, immediately. But the nice ones – the ones that are clean and tidy and everything appears to be in the right place, best I can tell, – those are the ones that too often baffle me. I hate the ones with automatic flushes that flush before I am ready. Then there are the ones with delayed mechanisms to get the flush going. After waiting long enough to feel like nothing is going to happen, I start looking for the flush handle or the button or the pedal or something. Then on to the sink. Where are the faucets? I wave my hands here and there and if I am lucky, a measured amount of water appears, but my timing is off and I missed it. So I try again. Look for the soap. I do not think I even once have succeeded in getting the soap dispenser to dispense. Then on to the hand drier. Sometimes I pull a cloth towel through a machine; sometimes it turns out to be an empty paper towel dispenser. Sometimes I place my hands in a magical place and hot air loudly gushes forth. And sometimes I wave my wet hands here and there and nothing more happens.
1. Good lighting. Everything starts with good lighting. Use room lighting, spot lighting, and even motion sensor lighting in dark areas, like inside cabinets.
Pictured: Motion sensor LED light. The light comes on when the door is opened and stays lit for about 60 seconds, longer if more motion is detected. Rechargeable, and requires charging about once a month with average use.
2. Food Prep Tray. Place cutting board, utensils, and foods on a food prep tray, a tray with a lip around it. You will spend less time searching the floor for things that bounced, rolled, or fell.
Pictured: Orange plastic tray with lip around edges sits on countertop. On the tray are knife and fork, spices including salt, garlic, and paprika, 3 whole eggs and a stainless steel mixing bowl.
3. Stainless steel drinking cups. Instead of glasses that are easily tipped over and too often shatter, use stainless steel drinking cups. They are just a little more expensive up front but last and last without needing replacement, so quite cost effective in the long run. As an added bonus, they keep cold drinks naturally colder.
4. Two-sided cutting board. A cutting board with a black side and a white side provides contrast. Use the side that has the most contrast with the food you are cutting or chopping or dicing or slicing.
Pictured: An admittedly difficult-to-see 2-sided cutting board. The white side is shown. The black side is face down.
5. Sauce pans. Sauce pans contain food and spatter better than fry pans. The end result will be the same, but less food will slip, slide, or spatter over the sides.
Pictured: Sauce pan on stovetop containing a large slotted spoon for stirring, and the ingredients for “Thunder & Lightning.”
6. Oven-cooked bacon. Lay strips of bacon in a single layer on the bottom of a roasting pan. Place in a 400-degree oven for 22 minutes. Perfect bacon every time – and without the hot grease spatter. Google will suggest you use a cookie sheet. No! That hot grease will splash about when you remove the tray from the oven. Use a roasting pan. It is deeper and will contain the grease better. Trust me on this one!
Pictured: Cooked bacon on baking sheet fresh out of the oven.
7. Mandoline. Keep your fingers safe from sharp blades by slicing with a mandoline. Not only will your fingers and fingernails stay protected, but you will end up with uniform slices of fruits and vegetables, and more.
Pictured: A mandoline for safe and uniform slicing and its food holder. The food holder has a large knob for holding the food firmly in place for slicing.
8. Spice jar labels. Index cards (cut to fit) with spice names written with bold markers can be wrapped around spice jars and secured with a rubber band. See blog post “Spice Things Up” for details.
Pictured: 3 spice jars boldly labeled for curry, cinnamon, and cumin. Rubber bands hold the labels in place.
9. Bump dots. Place bump dots on microwave and oven and other appliance buttons to easily identify the location of buttons you use frequently. This ensures that you will consistently press the desired button, and you will also do so in less time. Bump dots are available in many sizes, shapes, and colors. If you know any people who are blind or visually impaired, odds are they have bump dots to spare. You only need a few.
Pictured: Assorted bump dots including flat felt dots, round cork dots, raised round orange dots, raised black round and square dots, and clear round raised dots. Many other sizes, shapes and colors are also available.
10. Spice ladles. Spice ladles can be dipped easily into spice jars and other condiments for removal of just the right amount. Avoid spills and waste. See blog post “4-Inch Ladles” for details.
Pictured: A jar of paprika with 3 spice ladles, a soup ladle, and a teaspoon.
11. Double spatula. A double spatula makes turning pancakes, french toast, hamburgers, and more, an easy task.
Pictured: A double spatula – 2 spatulas with a nonstick finish that are connected in order to work together as tongs or flippers.
12. Silicone trivets. Multi-purpose silicone trivets, typically 8-inches in diameter, can be used as hot pads, potholders, coasters, and more. They can easily be trimmed, if desired. Because of their nonslip properties, I find them most beneficial as nonslip pads for mixing bowls, hot pots, serving bowls, cups, etc.
Pictured: An 8-inch diameter silicon trivet that has been trimmed to 5 inches. The cutaway ring can be used under mixing bowls, etc., to prevent slippage.
Bonus
Your personal assistant – Alexa, Cortana, Siri, etc. Ask your personal assistant to set a timer for you, read a recipe, or suggest substitute ingredients.
Pictured: An iPhone. Siri ha set the timer and it is displayed.
_________________________________________
Links of products and information related to the above blog post. Note that the links showing items for purchase are for information only and are not specifically endorsed.
Men do it, women do it, even dedicated blind do it. So grab your hooks or your needles and let’s look at some tips to make yarn crafts more accessible, organized, and fun.
Pictured: Crocheted items include hotpad, hat with pompom, scarf, and towel holders.
Tip #1
Good lighting. A task light can be the best tool of all.
Pictured: A desk lamp with soft-light fluorescent bulb is designed for task lighting. The head can be positioned and directed as needed. This lamp is directed on a cone of red cotton yarn and a crochet hook with beginning slip knot.
Tip #2
Use chunky yarn and larger hooks and needles. Larger gauge materials are easier to work with. With some experience, common 4-ply yarn can be doubled and even tripled for some projects.
Pictured: Two skeins of red yarn. On the left is worsted weight and on the right is super chunky. The super chunky yarn is much thicker and requires a much larger crochet hook, as shown.
Tip #3
Use large print or audio pattern instructions. (Duh!)
Pictured: YouTube icon. YouTube has many crochet tutorials and patterns in audio format.
Tip #4
Consider loom knitting. Loom knitting can be easier to work with, especially for newbies, with fewer dropped stitches.
Pictured: A pink knitting loom with a pink knitted hat in progress.
Tip #5
Use paper clips as stitch markers. The colorful vinyl-coated paper clips work well with little or no snagging. The paper clips are also great as a place holder at the end of your knit/crochet session. Slip a paper clip through the last stitch, and even the cat won’t be able to unravel your work overnight while you sleep.
Pictured: Six paper clips, all vinyl coated, assorted colors.
Tip #6
Use plastic blunt-tipped needles for weaving in all those ends at project’s conclusion.
Pictured: Three blunt-tipped plastic sewing needles with large eyes for working with yarn.
Tip #7
Use a needle threader. Some needle threaders are better than others. The needle threader pictured below is my favorite. I have been using just one of them for years now. I have not needed to use any of the backup threaders.
Pictured: Three identical flat metal needle threaders. Each has a small hook on one end for threading embroidery threads and a larger hook at the opposite end for threading yarns of various types.
Tip #8
Keep a magnet in a small sewing box with your needles. This will save you from crawling on your hands and knees hunting for that dropped needle or pin. A magnet holds onto my needle threaders too.
Pictured: A small metal box with two magnets inside, one on the inside lid and one on the inside bottom. Paper clips and needle threaders are held in place by the top magnet, and sewing and embroidery needles are held in place by the bottom magnet.
Tip #9
Store project – all yarn, hooks, instructions, etc. – in a plastic bag or box. Keep a written or voice recorded record of yarn type and color, hook/needle size, and any special instructions. You might add the date in case it becomes a time capsule.
Pictured: A clear plastic zippered bag with crochet project, working yarn, crochet hook and written instructions inside. The instructions card says: Hat, Caron Simply Soft white, hook H, scrap colors #4.
Tip #10
Keep your working yarn in a container to keep the yarn balls from rolling around and onto the floor. A colander works well for multiple balls of different colors. A coffee can can be repurposed to fit the need, as can a shoe box or almost any other container.
Pictured: A colander with two skeins of yarn (one pink, one white) with yarn ends poking through colander holes from inside to outside. A crochet hook is seen with white yarn ready to be worked.
Bonus Tip
Replace your sewing straight pins with sewing clips. When you drop one without even knowing it, sewing clips are so much less painful to step on!
Pictured: Four sewing clips of various colors. Each clip is pressed open and clamps onto the fabric much like a miniature clothespin.
__________________________
The following products are presented for information only. They are not specifically endorsed.
Pictured: Gray floppy sun hat and gray sneakers. Ready for summer.
I have a love-hate relationship with the sun.
The sun warms my heart and my soul. It is also painful to my eyes. I love a sunny day; the sunshine lifts my spirits. I hate a sunny day; the sunshine whites out my vision and I see nothing, my eyes tear, and I feel pain.
I have tried all kinds of sunglasses: prescription sunglasses (very expensive), wraparound sunglasses that go over eyeglasses (very bulky), and flip-ups that don’t – don’t flip up enough and out of the way, that is. I have tried various tints – dark green, mirror, gray, blue, brown, and yellow – all of which have benefits in direct sun, but when I step under the shade of a tree, my vision is reduced to seeing nothing.
I had mobility training last summer. I learned a lot from this wonderful teacher. Best of all, she suggested I try a hat.
So, hats I tried. I started with sun visors. Then I tried brimmed sports caps. Both styles did block the sun and let light in for shade, but those looked – let’s just say odd, not me at all. So next I tried floppy sun hats. Yes!
Floppy hats work for me. I found one that rolls up to carry in my purse, and unrolls beautifully when needed. It blocks the sun yet lets in the light. It even matches my shoes!
Hats off to Karen, my mobility instructor. Hats on to summer sun!
Pictured: The author, Renee, outdoors on a sunny day, wearing floppy gray sun hat.
Pictured: A braille book with small binder clip marking the page at about 1/3 of the way down the page.
A print book with a small binder clip marking the right-hand page about 2/3 of the way down the page.
Do you ever get lost? In a book, I mean. Do you read a bit and take a break and go back later to continue? Where did you leave off? How do you know where to pick up your reading? How long does it take to find your place? Where is that word or phrase you wanted to look at again, but later?
When I took my first braille course at Hadley (Braille Literacy 1, uncontracted braille), I was given sheets of sticky felt circles to use as place holders, – bookmarks, if you will. I found them to be somewhat of an annoyance. They seemed to stick to my fingers more often than the page. They were not removable and so added bulk to the book. And because I have some vision, I found them to be distracting on the page.
It was not long before I stopped using those sticky dots and started using Post-It Notes. Maybe I should have tried the name brand and not the generic, because they seemed to fall off the page all too often.
And then I found my problem-solver – binder clips! I place a small binder clip at the edge of the page at the spot where I left off. The binder clip stays put. It is easy to relocate, and I always know exactly where I left off – instantly.
Pictured: Five binder clips in assorted colors and positions. The top 2 are each about 1-1/4 inch wide and the bottom three are each about 3/4 inch wide.
I bet sighted people would benefit from these handy-dandies too.
What do you use to help you find your place in a book?